https://liveyourit.tistory.com/83
QEMU, 펌웨어를 이용한 가상 공유기 환경 구축 (MIPS)
QEMU 에뮬레이터와 QEMU에 가상으로 실행시키고 싶은 공유기 펌웨어를 사용해 가상 공유기 환경을 구축하고 실행시켜보려고 한다. 구축 환경은 우분투 x64이고 펌웨어는 제조사 웹사이트에 공개된
liveyourit.tistory.com
참고
위 경로와 동일하게
- 환경 : ubuntu-22.04-beta-desktop-amd64.iso
- 펌웨어 : 구버전 펌웨어
- 파일시스템 : MIPS
이미지 파일 다운로드 경로
https://people.debian.org/~aurel32/qemu/mips/
https://people.debian.org/~aurel32/qemu/mips/vmlinux-3.2.0-4-5kc-malta
https://people.debian.org/~aurel32/qemu/mips/debian_wheezy_mips_standard.qcow2
wget 명령어 사용해서
https://people.debian.org/~aurel32/qemu/mips/vmlinux-3.2.0-4-5kc-malta
https://people.debian.org/~aurel32/qemu/mips/debian_wheezy_mips_standard.qcow2
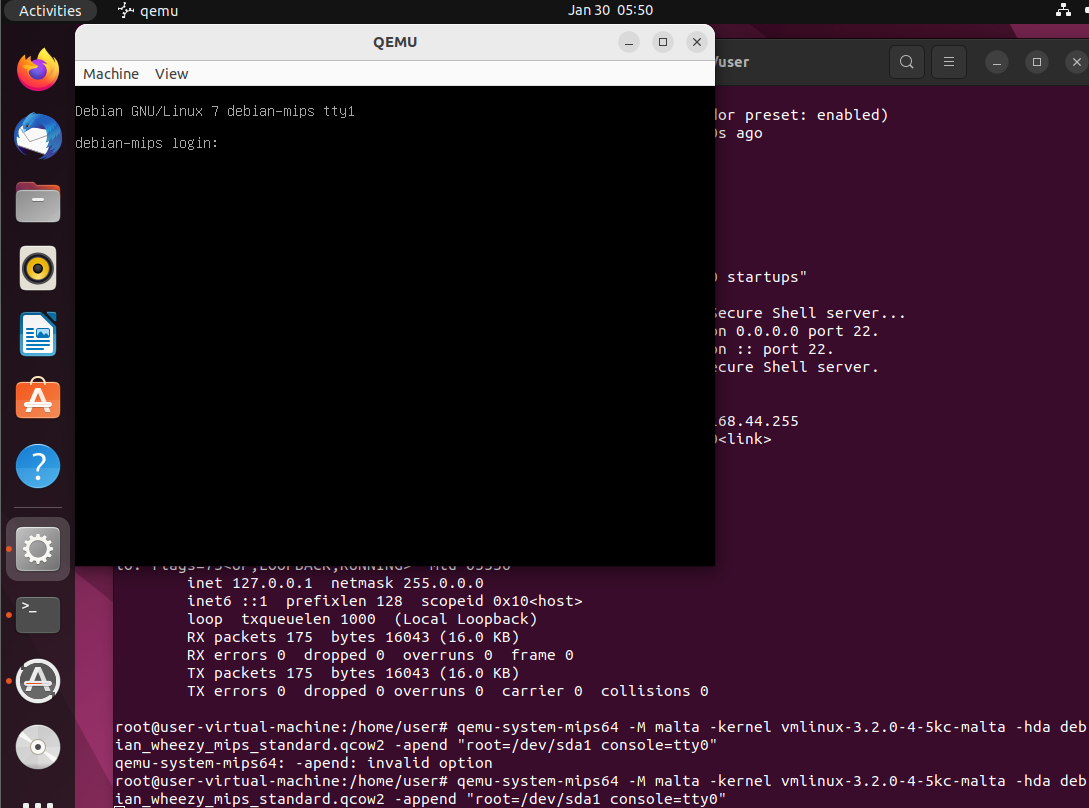
cd /usr/bin 경로로 이동

qemu-system-mips64 -M malta -kernel vmlinux-3.2.0-4-5kc-malta -hda debian_wheezy_mips_standard.qcow2 -append "root=/dev/sda1 console=tty0"
명령어 입력
'하드웨어 해킹 및 임베디드' 카테고리의 다른 글
| 윈도우환경에서-QEMU-설치하기-사용법 (펌) (0) | 2025.02.04 |
|---|---|
| 임베디드 바이너리 분석 및 퍼징 등 (진행 중) (0) | 2025.02.02 |
| 펌웨어 분석 건 (25년 1월) (0) | 2025.01.28 |
| Bluetooth 공격 기법 (0) | 2023.06.30 |
| Chapter 7. Device control (0) | 2023.06.25 |

wtdsoul