A deep dive into AWS S3 access controls – taking full control over your assets
경로 및 정보 2024. 2. 5. 11:06
A deep dive into AWS S3 access controls - Labs Detectify
Original research from Frans Rosen on vulnerabilities in AWS S3 bucket access controls and how to do set it up properly and monitor security.
labs.detectify.com
TL;DR: Setting up access control of AWS S3 consists of multiple levels, each with its own unique risk of misconfiguration. We will go through the specifics of each level and identify the dangerous cases where weak ACLs can create vulnerable configurations impacting the owner of the S3-bucket and/or through third party assets used by a lot of companies. We also show how to do it properly and how to monitor for these sorts of issues.
A simplified version of this write-up is available on the Detectify blog.
Quick background
Amazon Web Services (AWS) provides a service called Simple Storage Service (S3) which exposes a storage container interface. The storage container is called a “bucket” and the files inside the bucket are called “objects”. S3 provides an unlimited storage for each bucket and owners can use them to serve files. Files can be served either privately (via signed URLs) or publicly via an appropriately configured ACL (Access Control List) or ACP (Access Control Policy).
AWS also provides a (CDN) service called CloudFront which is often configured to quickly serve S3 hosted files/objects from an optimized CloudFront server as close as possible to the user who is requesting the file.
Introduction
Recently, a few blog posts have mentioned scenarios where the misconfiguration of a S3 bucket may expose sensitive data as well as explaining that the S3 access control lists (ACL) are quite different to the regular user permission setup in AWS which is called Identify Access Management (IAM).
However, we decided to approach this from a different angle. By identifying a number of different misconfigurations we discovered that we could suddenly control, monitor and break high end websites due to weak configurations of the bucket and object ACLs.
Disclaimer
All instances disclosed below were reported to the affected parties using responsible disclosure policies. In some of the cases, third party companies were involved and we got assistance from the companies affected to contact the vulnerable party.
We do not recommend testing any of the vulnerable scenarios below without prior approval. This is especially important in scenarios where the only way to identify the vulnerability was to actually override files and configurations. We did, however, identify one method to detect one of the vulnerable setups without actually modifying the data. You should still make sure you’re not affecting any party that has not given you written approval.
Technical details
The different misconfigurations and the impact of each depend on the following criteria:
- Who owns the S3 bucket
- What domain is being used to serve the files from the bucket
- What type of files are inside the bucket
We will try to go through all different cases below and explain when they can be created with a vulnerable misconfiguration.
Identification of buckets
To start off, we need to be able to identify buckets owned by or used by the company. We need the specific bucket’s name to make signed requests to the bucket.
Identifying a bucket depends on the setup and also how the bucket is being reached: The request can go directly to S3, to CloudFront (or any other CDN proxy serving files from the bucket), to the S3 “Static Website” option, or more.
Some methods to identify S3-buckets are:
- Look at the HTTP-response for a Server-header which says AmazonS3.
- Look at a random URL that doesn’t exist and see if it gives you a S3-404, either with “Static Website enabled” or not, containing Access Denied or NoSuchKey:
-

- The DNS-entry of the domain might reveal the bucket-name directly if the host points directly to S3.
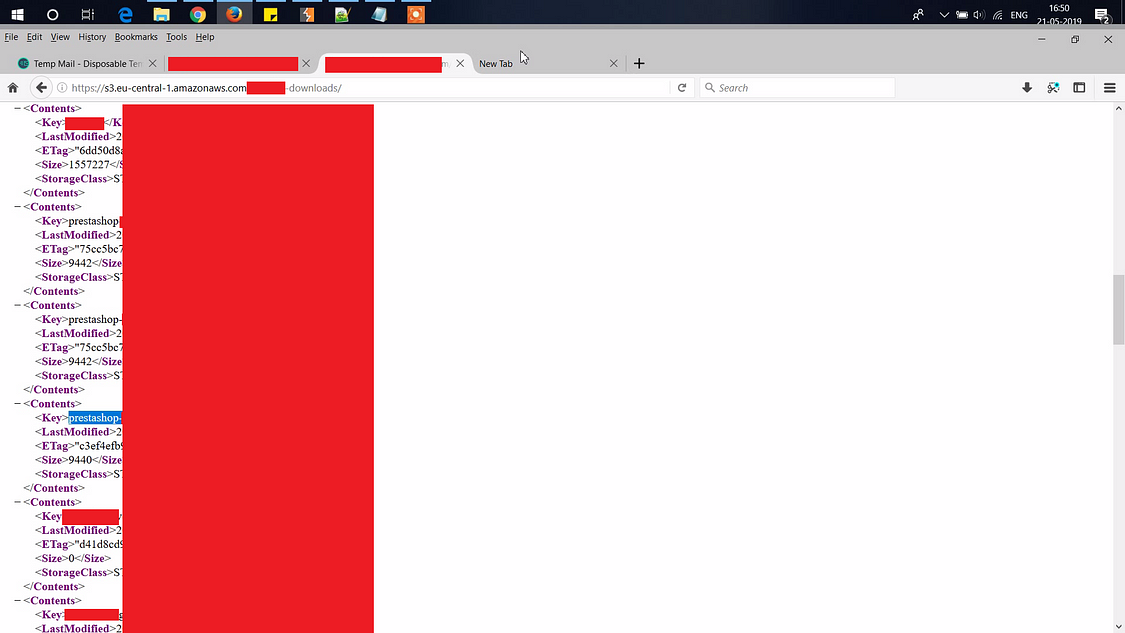
- Try accessing the root-URL. If index-listing is enabled (public READ on the Bucket ACL) you will be able to see the bucket-name defined in <Name>-element.
We have identified multiple ways to make an S3-bucket actually reveal itself independent of proxies in front of it. We have notified AWS about these methods and chosen not mention them above.
If you do find a domain that is pointing to a bucket, but cannot get the bucket name, try the actual fully qualified domain name (FQDN) as the bucket name, this is a common setup, having the bucket named as the domain that is pointing to it.
If this doesn’t work, try to:
- Google the domain and see if any history of it exposes the bucket name.
- Look at response headers of objects in the bucket to see if they have meta data that reveals the bucket name.
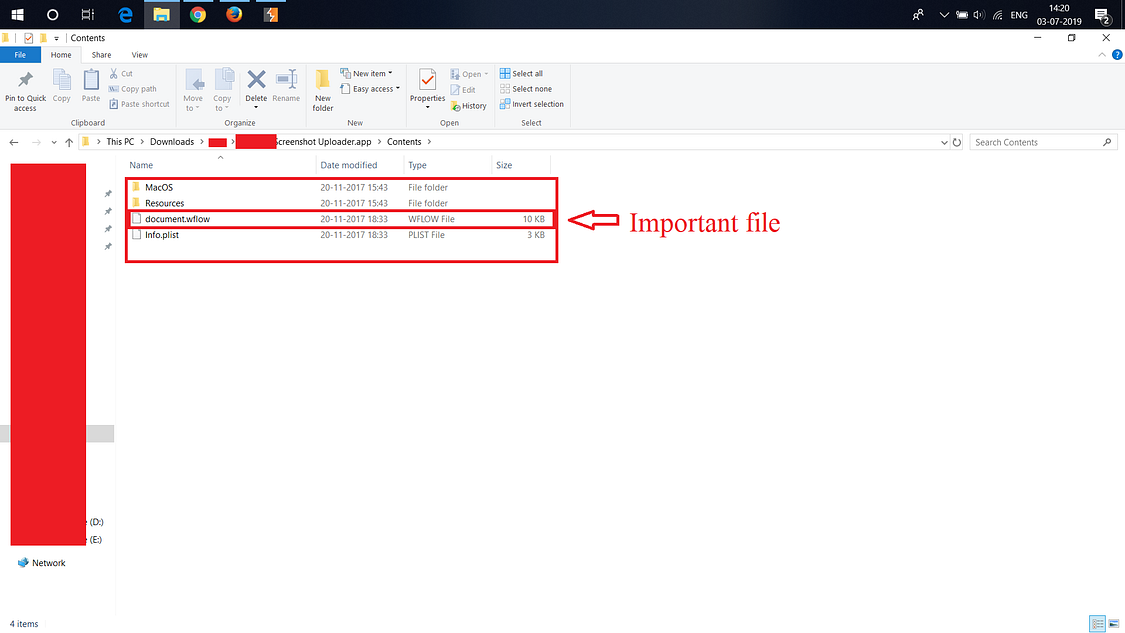
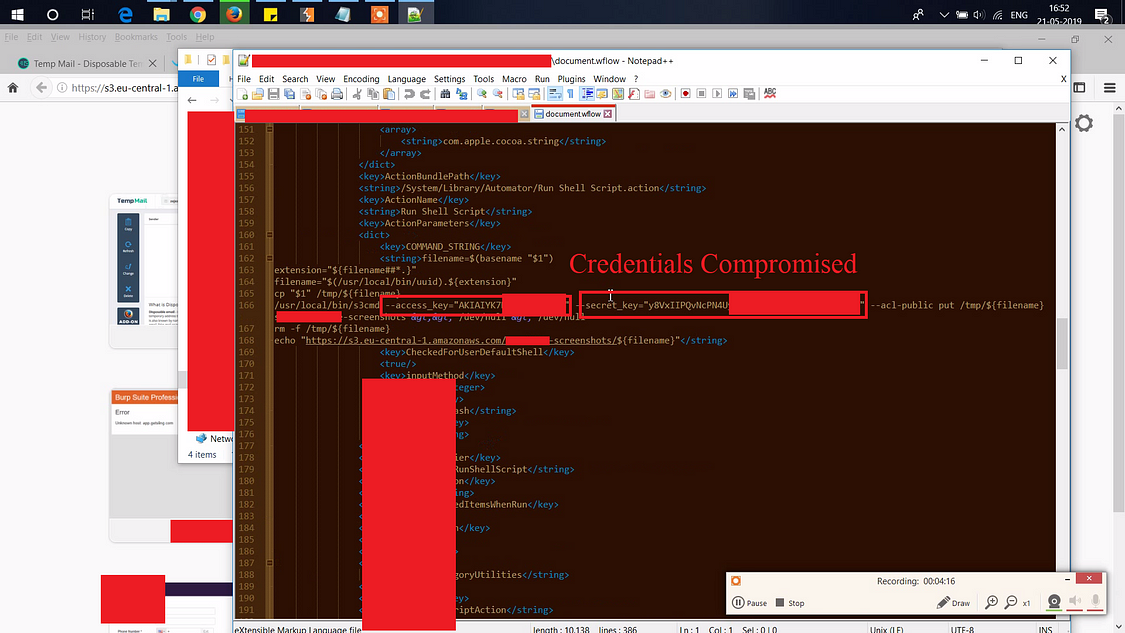
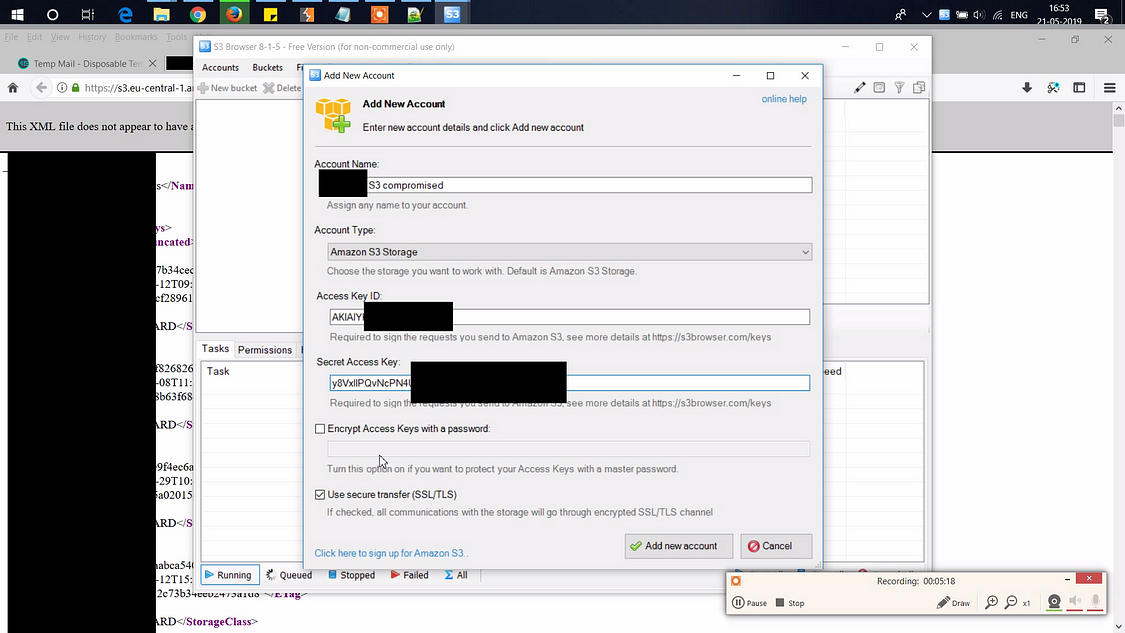
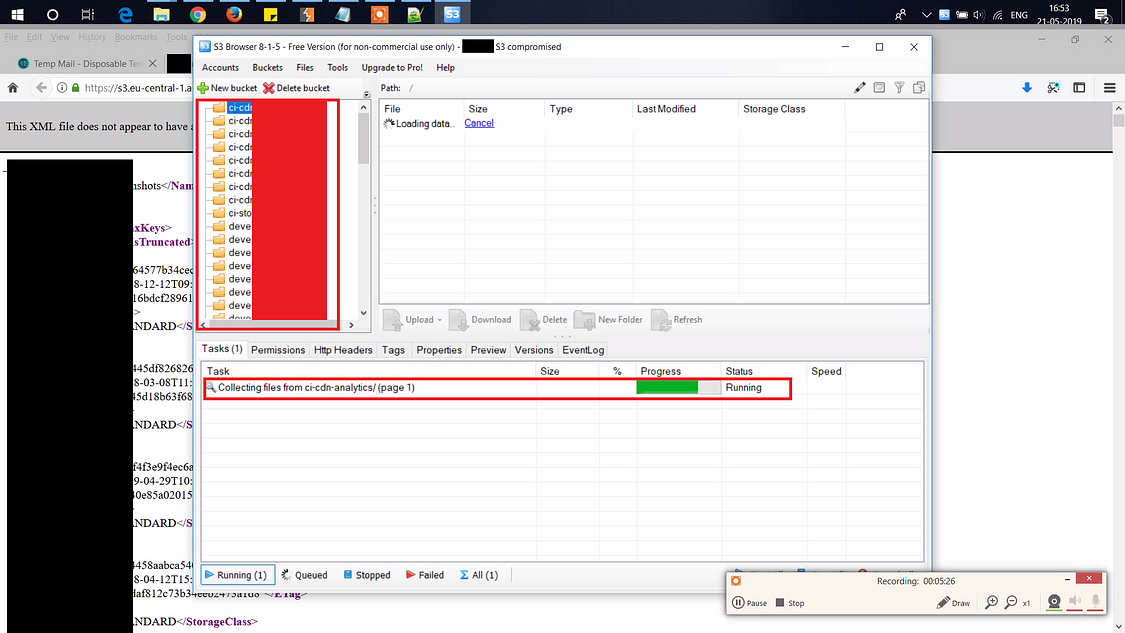
- Look at the content and see if it refers to any bucket. We’ve seen instances where assets are tagged with the bucket name and a date when they were deployed.
- Brute-force. Be nice here, don’t shoot thousands of requests against S3 just to find a bucket. Try be clever depending on the name of the domain pointing to it and the actual reason why the bucket exists. If the bucket contains audio files for ACME on the domain media.acme.edu, try media.acme.edu, acme-edu-media, acme-audio or acme-media.
If the response on $bucket.s3.amazonaws.com shows NoSuchBucket you know the bucket doesn’t exist. An existing bucket will either give you ListBucketResult or AccessDenied.
(You might also stumble upon AllAccessDisabled, these buckets are completely dead).
Remember, just because a bucket is named as the company or similar, that doesn’t mean it is owned by that company. Try find references directly from the company to the bucket to confirm it is indeed owned by the specific company.
Permission/predefined groups
First, we will explore the different options that can be used for giving access to a requester of a bucket and the objects within:
ID / emailAddress
You are able to give access to a single user inside AWS using either the AWS user ID or their email address. This makes sense if you want to allow a single user to have specific access to the bucket.
AuthenticatedUsers
This is probably the most misunderstood predefined group in AWS S3’s ACL. Having the ACL set to AuthenticatedUsers basically means “Anyone with a valid set of AWS credentials”. All AWS accounts that can sign a request properly are inside this group. The requester doesn’t need to have any relation at all with the AWS account owning the bucket or the object. Remember that “authenticated” is not the same thing as “authorized”.
This grant is likely the most common reason a bucket is found vulnerable in the first place.
AllUsers
When this grant is set, the requester doesn’t even need to make an authenticated request to read or write any data, anyone can make a PUT request to modify or a GET request to download an object, depending on the policy that is configured.
Policy permissions / ACP (Access Control Policies)
The following policy permissions can be set on the bucket or on objects inside the bucket.
The ACPs on bucket and objects control different parts of S3. AWS has a list showing exactly what each grant does. There are more cases not mentioned below where you can create specific IAM policies for a bucket, called a bucket-policy. Creating a bucket-policy has its own issues, however, we will only cover the standard setup of ACLs set on buckets and objects.
READ
This gives the ability to read the content. If this ACP is set on a bucket, the requester can list the files inside the bucket. If the ACP is set on an object, the content can be retrieved by the requester.
READ will still work on specific objects inside a bucket, even if Object Access READ is not set on the complete bucket.
With the following ACL setup inside AWS S3:
| Bucket-ACL: | Object-ACL: |
We can still read the specific object:
$ aws s3api get-object --bucket test-bucket --key read.txt read.txt
{
    "AcceptRanges": "bytes",
    "ContentType": "text/plain",
    "LastModified": "Sun, 09 Jul 2017 21:14:15 GMT",
    "ContentLength": 43,
    "ETag": ""1398e667c7ebaa95284d4efa2987c1c0"",
    "Metadata": {}
}
This means READ can be different for each object, independently of the settings on the bucket.
READ_ACP
This permission gives the ability to read the access control list of the bucket or object. If this is enabled, you can identify vulnerable assets without trying to modify the content or ACP at all.
READ_ACP will still work on specific objects inside a bucket, even if Object Access READ_ACP is not set on the complete bucket.
| Bucket-ACL: | Object-ACL: |
$ aws s3api get-object-acl --bucket test-bucket --key read-acp.txt
{
    "Owner": {
        "DisplayName": "fransrosen",
        ...
This means READ_ACP can be different for each object, independently of the settings on the bucket.
WRITE
This permission gives the ability to write content. If the bucket has this enabled for a user or group, that party can upload, modify and create new files.
WRITE will not work on specific objects inside a bucket, if Object Access WRITE is not set on the complete bucket:
| Bucket-ACL: | Object-ACL: |
$ aws s3api put-object --bucket test-bucket --key write.txt --body write.txt

An error occurred (AccessDenied) when calling the PutObject operation: Access Denied
However, if WRITE is set on the bucket, all objects will obey and will not be able to decide individually if they should be writable or not:
| Bucket-ACL: | Object-ACL: |
$ aws s3api put-object --bucket test-bucket --key write.txt --body write.txt
{
    "ETag": ""1398e667c7ebaa95284d4efa2987c1c0""
}
This means, WRITE can be verified on the bucket in two ways, either by uploading a random file, or by modifying an existing one. Modifying an existing file is destructive and should not be done at all. Below we will explain a way to check this without doing a destructive call, by triggering an error in between the access control check and the actual modification of the file.
WRITE_ACP
This permission gives the ability to modify the permission ACL of a bucket or object.
If the bucket has this enabled for a user or a group, that party can modify the ACL of the bucket which is extremely bad. Having WRITE_ACP on a bucket will completely expose it to be controlled by the party having the ACP set, meaning any content of any object can now be controlled by the party. The attacker might not be able to READ every object already in the bucket, but they can still fully modify the existing objects. Also, the initial owner of the S3-bucket will get an Access Denied in the new AWS S3-console when the attacker is claiming ownership of it when removing the READ-access on the bucket.
First, no access to READ_ACP or WRITE:
$ aws s3api get-bucket-acl --bucket test-bucket

An error occurred (AccessDenied) when calling the GetBucketAcl operation: Access Denied

$ aws s3api put-object --bucket test-bucket --key write-acp.txt --body write-acp.txt

An error occurred (AccessDenied) when calling the PutObject operation: Access Denied
Then we try to change the bucket ACL:
$ aws s3api put-bucket-acl --bucket test-bucket --grant-full-control emailaddress=frans@example.com && echo "success"
success
The initial owner of the bucket will now see this:

(Being the owner, they will still be able to modify the policy of the bucket, but this is a weird case anyway.)
We can now control everything:
$ aws s3api get-bucket-acl --bucket test-bucket
{
...
    "Grants": [
        {
            "Grantee": {
                "Type": "CanonicalUser",
                "DisplayName": "frans",
                "ID": "..."
            },
            "Permission": "FULL_CONTROL"

$ aws s3api put-object --bucket test-bucket --key write-acp.txt --body write-acp.txt
{
    "ETag": ""1398e667c7ebaa95284d4efa2987c1c0""
}
A very interesting thing is that WRITE_ACP will actually still work on specific objects inside a bucket even if Object Access WRITE_ACP is not set on the complete bucket:
| Bucket-ACL: | Object-ACL: |
$ aws s3api put-object-acl --bucket test-bucket --key write-acp.txt --grant-write-acp uri=http://acs.amazonaws.com/groups/global/AuthenticatedUsers && echo "success"
success
Also, the opposite of WRITE applies here, having WRITE_ACP on the bucket, doesn’t mean you directly have WRITE_ACP on an object:
| Bucket-ACL: | Object-ACL: |
$ aws s3api put-object-acl --bucket test-bucket --key write-acp.txt --grant-full-control emailaddress=frans@example.com

An error occurred (AccessDenied) when calling the PutObjectAcl operation: Access Denied
However, by performing the following steps when having WRITE_ACP on the bucket you will still gain full access of the content of any object, by replacing the existing object with new content:
- Modify the bucket ACL:
$ aws s3api put-bucket-acl --bucket test-bucket --grant-full-control emailaddress=frans@example.com && echo "success" success - Modify the object (This changes you to the owner of the object):
$ aws s3api put-object --bucket test-bucket --key write-acp.txt --body write-acp.txt { "ETag": ""1398e667c7ebaa95284d4efa2987c1c0"" } - Modify ACP of the object again:
$ aws s3api put-object-acl --bucket test-bucket --key write1.js --grant-full-control emailaddress=frans@example.com && echo "success"
success
Since WRITE still needs to be set on the bucket, you cannot upgrade a WRITE_ACP on an object to give yourself WRITE on the same object:
$ aws s3api put-object-acl --bucket test-bucket --key write-acp.txt --grant-write-acp uri=http://acs.amazonaws.com/groups/global/AuthenticatedUsers --grant-write uri=http://acs.amazonaws.com/groups/global/AuthenticatedUsers --grant-read-acp uri=http://acs.amazonaws.com/groups/global/AuthenticatedUsers --grant-read uri=http://acs.amazonaws.com/groups/global/AuthenticatedUsers && echo "success"
success| Bucket-ACL: | Object-ACL: |
This will still give you:
$ aws s3api put-object --bucket test-bucket --key write-acp.txt --body write-acp.txt

An error occurred (AccessDenied) when calling the PutObject operation: Access Denied
However, you can still remove all ACPs on the object, making the object completely private, which will stop it being served, giving a 403 Forbidden.
WRITE_ACP can unfortunately only be verified by testing writing a new ACP on a bucket or object. Modifying the existing one is of course destructive and should not be done without approval. We have not found a non-destructive way of testing this ACP.
FULL_CONTROL
This is the policy that combines all other policies. However, WRITE will still not work on an object unless the bucket has it set, even if this permission is set on an object.
Vulnerable scenarios
The following scenarios are cases where the company can be affected.
1. Bucket used on a domain owned by the company
You found a bucket which is served by a subdomain or domain of the company.
You should test for:
- BUCKET READ
Listing files in the bucket. Sensitive information might be exposed. - BUCKET READ-ACP
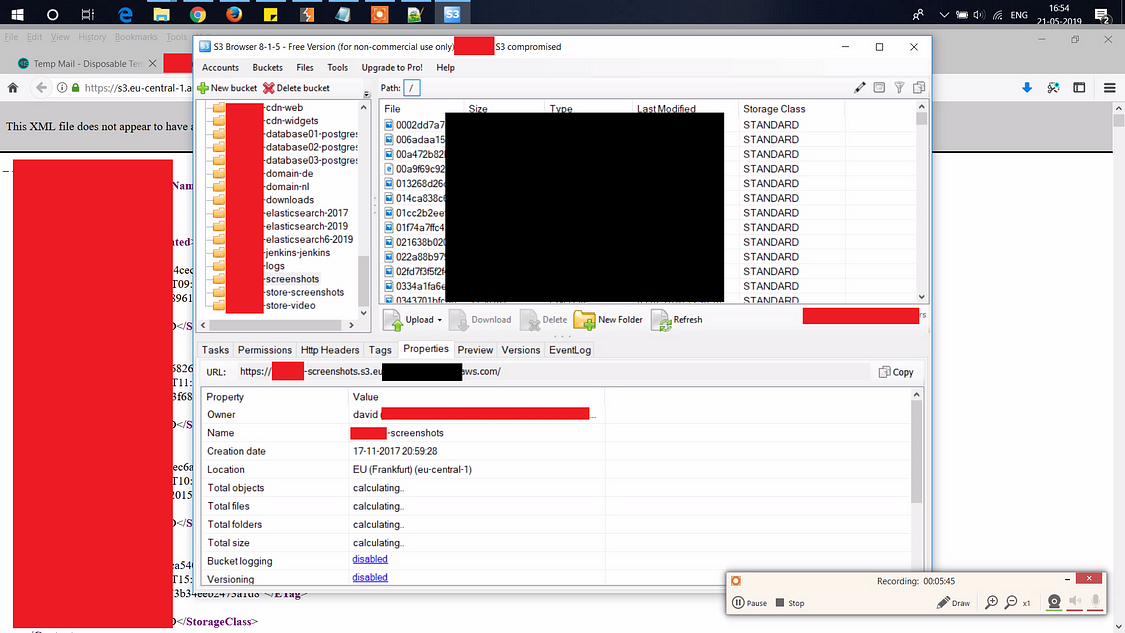
Let’s look at the ACP and see if we can identify the bucket being vulnerable without actually trying anything. If we see that AllUsers or AuthenticatedUsers has WRITE_ACP set, we know we can gain full control over the bucket, without doing anything else. - BUCKET WRITE (Simulate using invalid-MD5 hack)
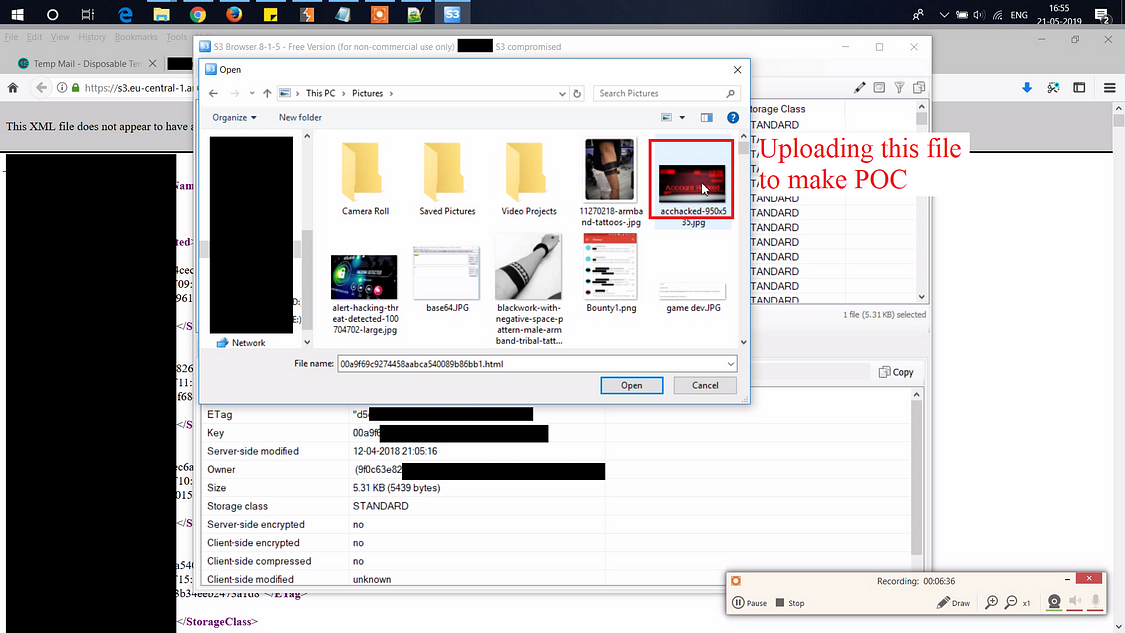
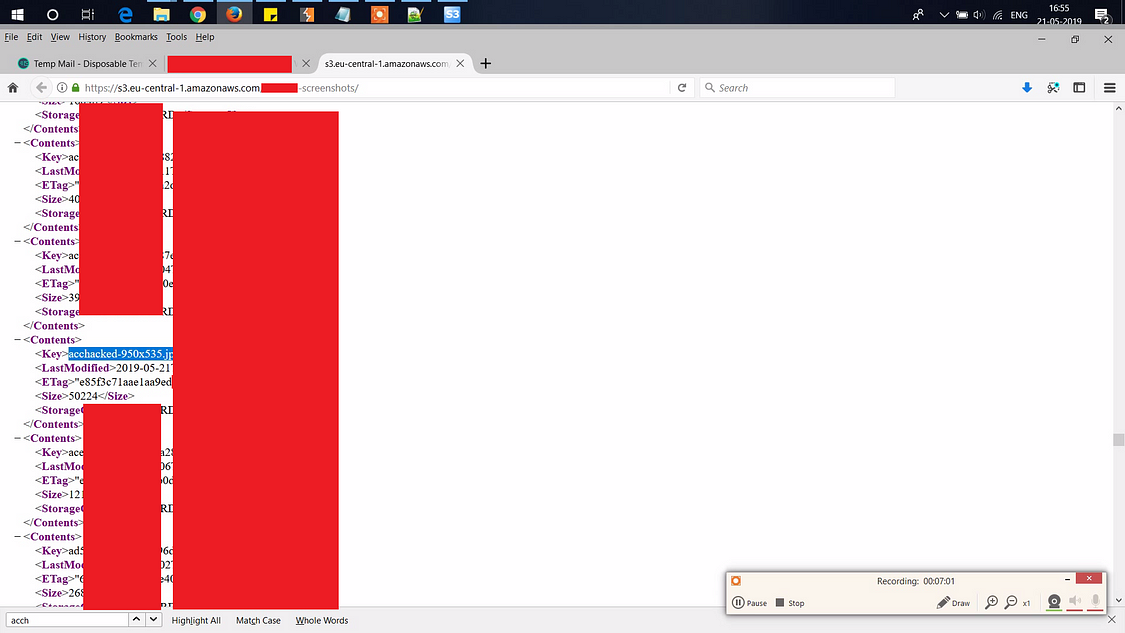
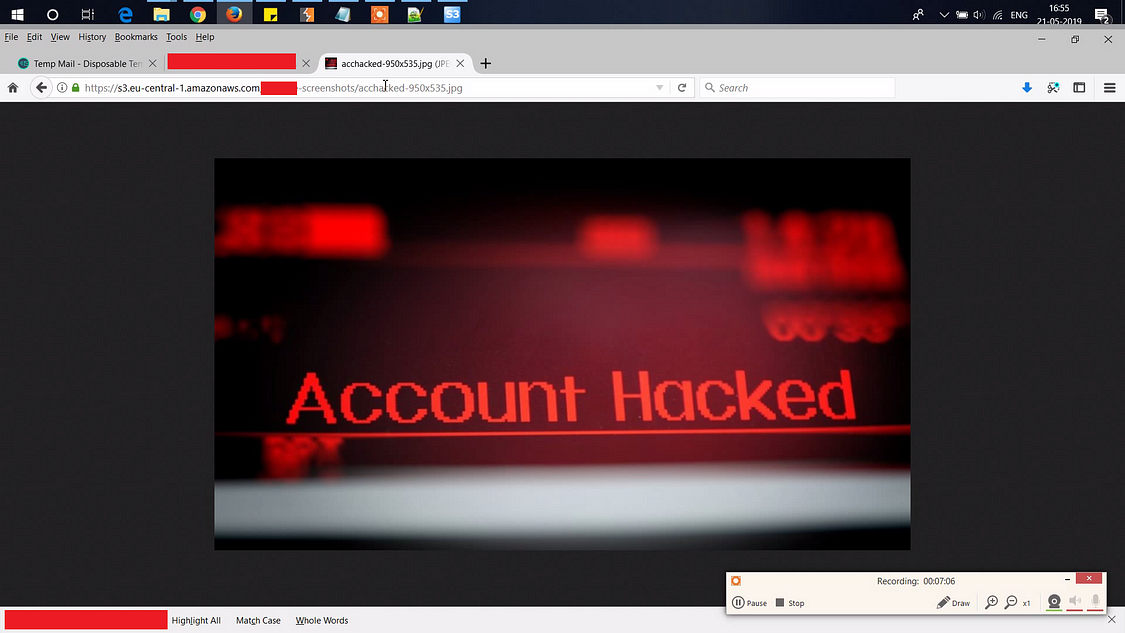
If we can upload a new file to the bucket. This also tells us we can overwrite any object in the bucket. However, if we want to avoid uploading anything, we can try the following hack, not uploading anything but still see that we are able to do it:
When making a signed PUT request to a bucket, we have the option to add a Content-MD5 telling AWS the checksum of the content being uploaded. It turns out that this check is happening inside the following flow:- Check that the user has access writing the file.
- Check that the MD5-checksum is matching the content.
- Upload the file.
On a bucket we can upload to, this will result in:On a bucket we cannot upload to, this will result in:We will therefore never modify the content, only confirm we can do it. This unfortunately only works on WRITE on objects, not on WRITE_ACP as far as we know.# use this by: ./put-simulate.sh test-bucket/write.txt AWS_ACCESS_KEY_ID="***" AWS_SECRET_ACCESS_KEY="***" AWS_S3_BUCKET="$(echo "$1" | cut -d "/" -f1)" AWS_PATH="/$(echo "$1" | cut -d "/" -f2-)" date=$(date +"%a, %d %b %Y %T %z") acl="x-amz-acl:private" content_type='application/octet-stream' # we create a checksum of the word "yepp", but will upload a file with the content "nope". content_md5=$(openssl dgst -md5 -binary <(echo "yepp") | openssl enc -base64) string="PUTn${content_md5}n${content_type}n${date}n${acl}n/${AWS_S3_BUCKET}${AWS_PATH}" signature=$(echo -en "${string}" | openssl sha1 -hmac "${AWS_SECRET_ACCESS_KEY}" -binary | base64) echo "PUT to S3 with invalid md5: ${AWS_S3_BUCKET}${AWS_PATH}" result=$(curl -s --insecure -X PUT --data "nope" -H "Host: ${AWS_S3_BUCKET}.s3.amazonaws.com" -H "Date: $date" -H "Content-Type: ${content_type}" -H "Content-MD5: ${content_md5}" -H "$acl" -H "Authorization: AWS ${AWS_ACCESS_KEY_ID}:${signature}" "https://${AWS_S3_BUCKET}.s3.amazonaws.com${AWS_PATH}") if [ "$(echo ${result} | grep 'The Content-MD5 you specified did not match what we received')" != "" ]; then echo "SUCCESS: ${AWS_S3_BUCKET}${AWS_PATH}" exit 0 fi echo "$result" exit 1 - $ ./put-simulate.sh test-secure-bucket/write.txt PUT to S3 with invalid md5: test-secure-bucket/write.txt <?xml version="1.0" encoding="UTF-8"?> <Error><Code>AccessDenied</Code><Message>Access Denied</Message>
- $ ./put-simulate.sh test-bucket/write.txt PUT to S3 with invalid md5: test-bucket/write.txt SUCCESS: test-bucket/write.txt
- The following bash code simulates this scenario:
- BUCKET WRITE-ACP
The most dangerous one. Fully upgradable to full access of the bucket. Destructive call. Be careful. The only way to do this one properly is to first figure out how the bucket behaves to not break any current ACP. Remember that you can still have access to WRITE_ACP even though you do not have access to READ_ACP.
API-documentation reference - OBJECT READ
We can try to read the content of files we are interested in found by BUCKET READ. - OBJECT WRITE
No need to test this one, since BUCKET WRITE decides fully. If BUCKET WRITE gives an error the object will not be writable and if BUCKET WRITE is successful, the object will always be writable.
However, if the company using the bucket has an application where users can upload files, look at the implementation of how they make the actual file upload to S3. If the company is using a POST Policy upload, specifically look in the policy at the Condition Matching of the $key and the Content-type. Depending on if they use starts-with you might be able to modify the content type to HTML/XML/SVG or similar, or change the location of the file being uploaded. - OBJECT WRITE-ACP
We can try modifying the ACP of the specific object. It will not enable us to modify the content, but only the access control of the file, giving us the ability to stop files from working publicly.
API-documentation reference
Possible vulnerabilities:
- Reflected XSS. If we can do BUCKET READ we can list assets and might find vulnerable objects, like a vulnerable SWF served on the company’s domain.
- Stored XSS / asset control. If we can do BUCKET WRITE or BUCKET WRITE-ACP (also meaning OBJECT WRITE) we can modify existing content or create new content, being able to modify javascript/css-files or by uploading a new HTML-file.
- Denial of server. If we can modify the ACP of objects using OBJECT WRITE-ACP, we can prevent objects from loading publicly.
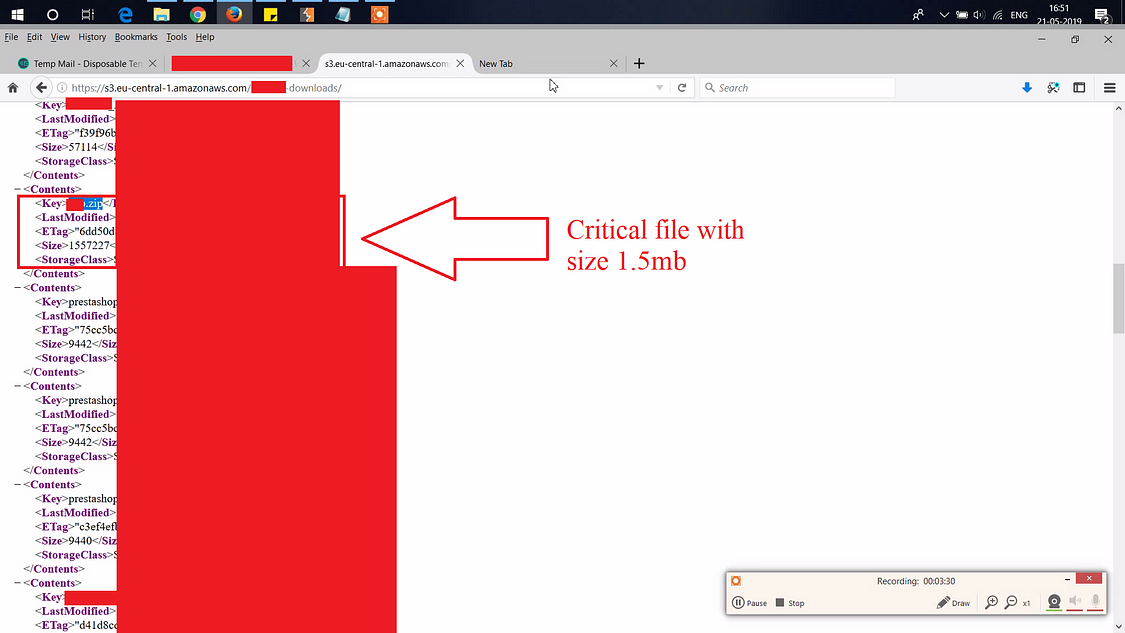
- Information disclosure. If we can list objects we might find sensitive information.
- RCE. If the bucket contains modifiable executables this can result in Remote Code Execution (RCE) depending on where the executables are being used and if/by whom they are being downloaded.
2. Assets from bucket used by the company
Additional Disclaimer: The assets being used by a company might not always be owned by the company. You need to be extremely careful here not to attack anyone other than the intended target who has given you permission to test.
There are projects trying to automate this, such as Second Order. However, Second Order only checks for assets being referenced in the HTTP-response, files being loaded dynamically are not being checked. Below is a quick example of also checking for dynamically loaded assets using Headless Chrome.
First, start the headless version on port 9222:
"/Applications/Google Chrome.app/Contents/MacOS/Google Chrome" --remote-debugging-port=9222 --disable-gpu --headlessWe can then use a small script. (context.js is borrowed from the HAR-capturer-project since that one properly closes tabs)
const CDP = require('chrome-remote-interface');
const URL = require('url').URL;
const Context = require('./context');

async function log_requests(orig_url) {
    const context = new Context({});

    process.on('SIGTERM', function () {
        context.destroy();
    });

    try {
        const client = await context.create();
        const {Network, Page} = client;
        const ourl = new URL('http://' + orig_url);
        const ohost = ourl.host;

        Network.requestWillBeSent((params) => {
            if (params.request.url.match('^data:')) {
                return;
            }
            const url = new URL(params.request.url);
            console.log(ohost + ':' + url.host + ':' + params.request.url);
        });
        await Promise.all([Network.enable(), Page.enable()]);
        await Page.navigate({url: 'http://' + orig_url});
        await Page.loadEventFired();
        await Page.navigate({url: 'https://' + orig_url});
        await Page.loadEventFired();
    } finally {
        await context.destroy();
    }
}
const url = process.argv.slice(2)[0];
log_requests(url);
Which will give us all assets on the page which we then can use to figure out if they are served from S3 or not:

You should test for:
Possible vulnerabilities:
- Stored XSS / asset control. If we can do BUCKET WRITE or BUCKET WRITE-ACP (also meaning OBJECT WRITE) we can modify existing content or create new content, being able to modify javascript/css-files or similar. This can be extremely bad depending on where the assets are being used, such as on login pages or on main pages.
- Denial of server. If we can modify the ACP of objects using OBJECT WRITE-ACP, we can prevent objects from loading publicly.
- RCE. If assets are modifiable executables this can result in Remote Code Execution (RCE) depending on where the executables are being used and if/by whom they are being downloaded.
3. Bucket randomly found, indications it’s owned by the company
This one is a bit complicated. You need to have clear evidence and proof that the bucket is indeed owned by the company. Try to find references from the company pointing to this bucket, such as references on their website, CI logs or open source code.
You should test for:
Possible vulnerabilities:
- Stored XSS / asset control. If we can do BUCKET WRITE or BUCKET WRITE-ACP (also meaning OBJECT WRITE) we can modify existing content or create new content, being able to modify javascript/css-files. However, in this case we don’t know where the files are being used so we cannot know how big the impact is without talking with the company.
- Denial of server. If we can modify the ACP of objects using OBJECT WRITE-ACP, we can prevent objects from loading publicly. We do not know in this case if they are however.
- Information disclosure. If we can list objects we might find sensitive information. Only do this if you have confirmed that the bucket is indeed connected to the company you have approval from.
- RCE. If the bucket contains modifiable executables this can result in Remote Code Execution (RCE) depending on where the executables are being used and if/by whom they are being downloaded.
Results
During this research we were able to confirm we could control assets on high profile websites. We reported these issues directly and were able to get them solved quickly. The following categories of websites were affected:
- Password managers
- DNS/CDN providers
- File storage
- Gaming
- Audio and video streaming providers
- Health tracking

We identified vulnerable assets placed on the login pages of some companies.
In some cases, vulnerable assets were loaded using Google Tag Manager (gtm.js) however, they did not sandbox the third parties properly, running the third party assets directly on the domain itself (not by sandboxing them using www.googletagmanager.com)
We got in touch with some third party providers, both directly but also with help from the affected companies, quickly identifying the issue and solving it very fast.
How to stay safe
The following processes can prevent this issue from happening:
- Sandbox third party assets. As soon as you are in need of third party assets, through gtm.js or similar, try isolating the scripts either by using the iframe provided by Google Tag Manager or by placing them on a separate domain (not only using a subdomain). Also ask your provider how they handle access control on their files, and if they are using S3 for file serving.
- If you have your own buckets, take a look through the bucket ACLs to verify WRITE and WRITE_ACP are only set on specific users, never on groups such as AllUsers or AuthenticatedUsers.
- The hardest fix is to prevent any object in any bucket from having WRITE_ACP, test yourself by doing a aws s3api put-object-acl with the appropriate settings using a restricted AWS-user against your own objects in your buckets. You might need to update the ACL on every object to mitigate this completely.
- Take a look and see how you are uploading objects to S3 buckets and make sure you set the proper ACLs on both buckets and objects.
- Do not use a secret bucket name as a form of Security through Obscurity. Treat the bucket name like it is already public information.
On a final note
It’s clear after this research that this problem is widespread and hard to identify and completely solve, especially if the company uses a huge amount of buckets, created by different systems. WRITE_ACP is the most dangerous one for reasons mentioned, both on buckets and objects.
An interesting detail when manually uploading files to S3 using Cyberduck, changing the access control on a file looks like this:

Pretty easy to accidentally pick the wrong one there.
Until next time.
What Detectify scans for
Detectify tests web applications for the following S3 misconfiguration vulnerabilities with a severity range between 4.4-9 on the CVSS scale:
- Amazon S3 bucket allows for full anonymous access
- Amazon S3 bucket allows for arbitrary file listing
- Amazon S3 bucket allows for arbitrary file upload and exposure
- Amazon S3 bucket allows for blind uploads
- Amazon S3 bucket allows arbitrary read/writes of objects
- Amazon S3 bucket reveals ACP/ACL
'경로 및 정보' 카테고리의 다른 글
| eSIM 구현 Android 오픈소스 (0) | 2024.03.06 |
|---|---|
| Teleport 관련 자료 (1) | 2024.02.24 |
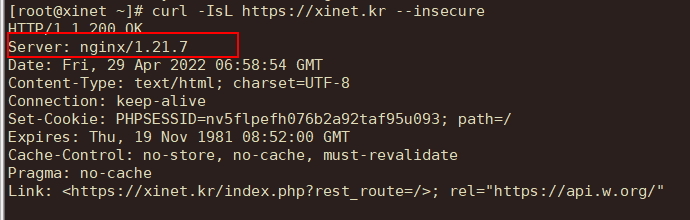
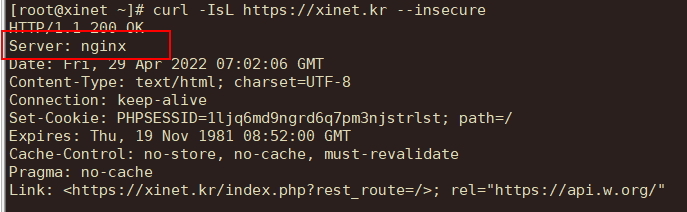
| nginx version 숨기기 및 header 정보 숨기기 (1) | 2023.12.07 |
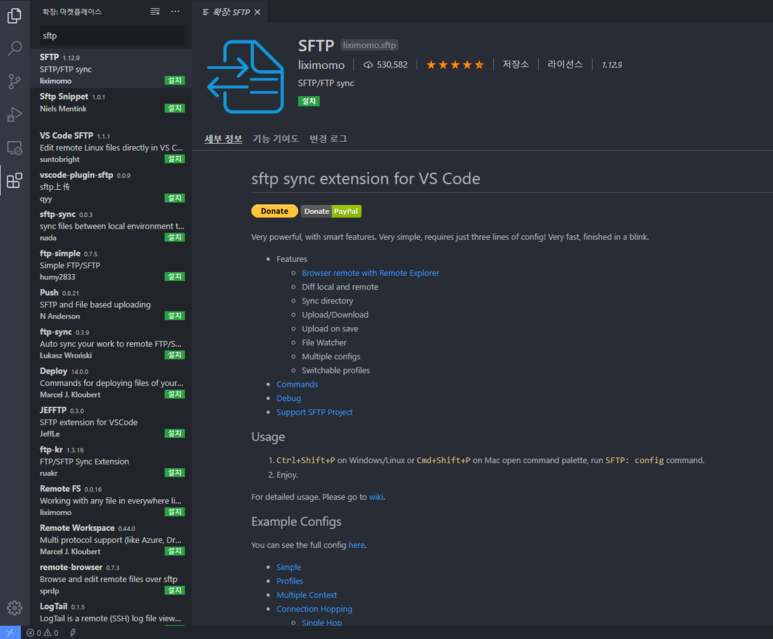
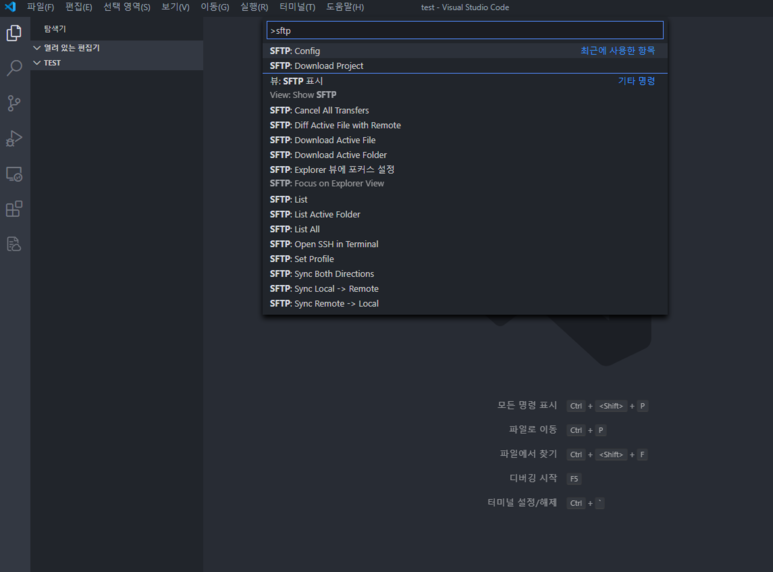
| /.vscode/sftp.json (0) | 2023.11.19 |
| Active Directory Basic 문제 (0) | 2023.11.12 |

wtdsoul